In the good tradition of many „project“ threads on this forum I would like to share with you my Busso 3,75 V6 built project. It might be inspiration for some of you or just source of info and pictures for the others.
In the following text I will be deliberately calling the engine 3,8l as its easier to use but as I am using 101mm liners it will really be 3749,5 cc engine and I plan to have 3,75 GTA written on the plenum as in my eyes it fits better to Alfa pedigree (1750 engines…)
History:
A friend of mine owned a 3,8l 156 GTA built by Autodelta as their first or one of the first 156/147/GT 3,75 conversions. You may know it, it was the red one with full wide bodykit on the AD press pictures from Brooklands. 40k kms after conversion this engine suffered a failure of big end bearing on cyl.4. Basically the bearings grinded completely to a very thin foil, or maybe the half bearings started to spin, the conrod developed a huge play, engine started to knock and it suffered a crank journal failure. The engine was taken apart after, but never rebuilt again. It spent years split in parts in many boxes somewhere in a garage...
As during last summer my GTA was almost in a condition I couldn´t think about anything to do on it I was missing some “project” in my life so I decided to give a try to the 3,8 rebuilt. Other reason to go for this engine was also that I don’t need to touch my GTA and take any parts of it and I can be building a second engine under no time pressure. Once the 3,8 is finished I just swap it for my current 3,2. In case I don’t build it right and something goes wrong I can always swap the 3,2 back in.
As mentioned, I started the project in summer 2011 with a time plan for the rebuilt of “about a year”.
These are the main specs and components of the engine:
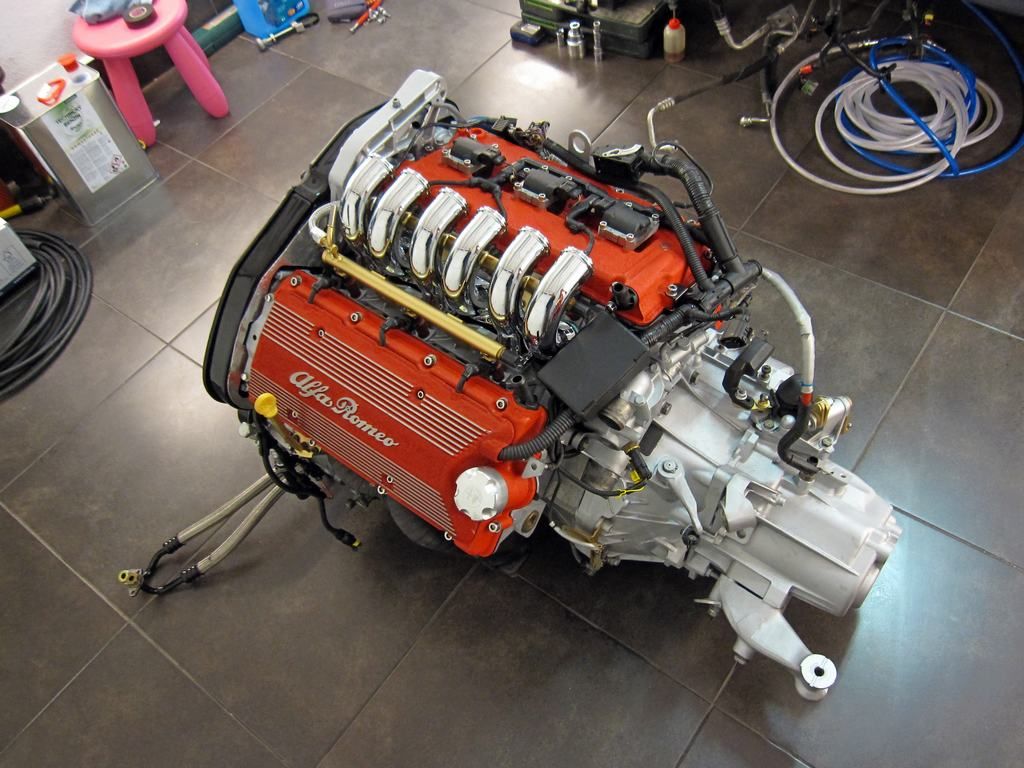
Here is the stuff I brought home:
![Image]()
![Image]()
I especially liked the “box with all bolts” that came out of the engine…. I cursed the people who were disassembling it years ago….
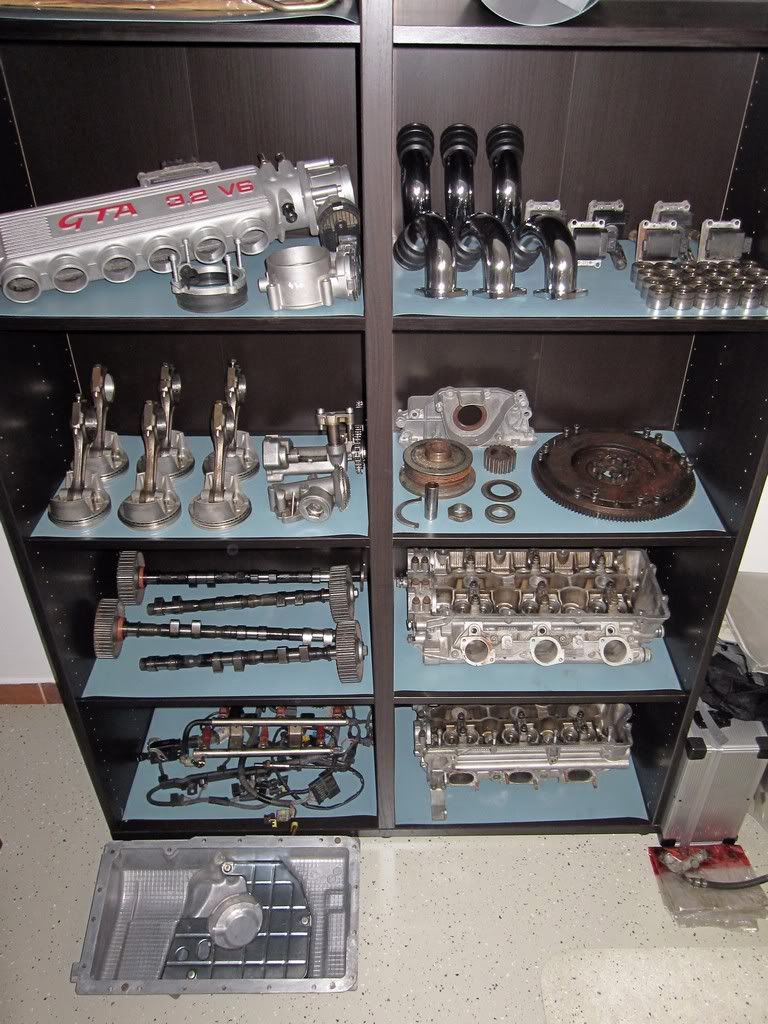
The first step was to clean some small things and make a little of order in the parts to be sure what I have and what I miss and make a plan in my head.
![Image]()
The main problem with this engine was the crankshaft and its journal on the con-rod nr4. It was oval , scratched and grinded well under spec… I know a place that could repair it, put new layers of hard chrome on the journals, nitride the journal surface and grind the journals to spec, but the price was quite steep and I was not sure about the result. So I needed a “new” crank.
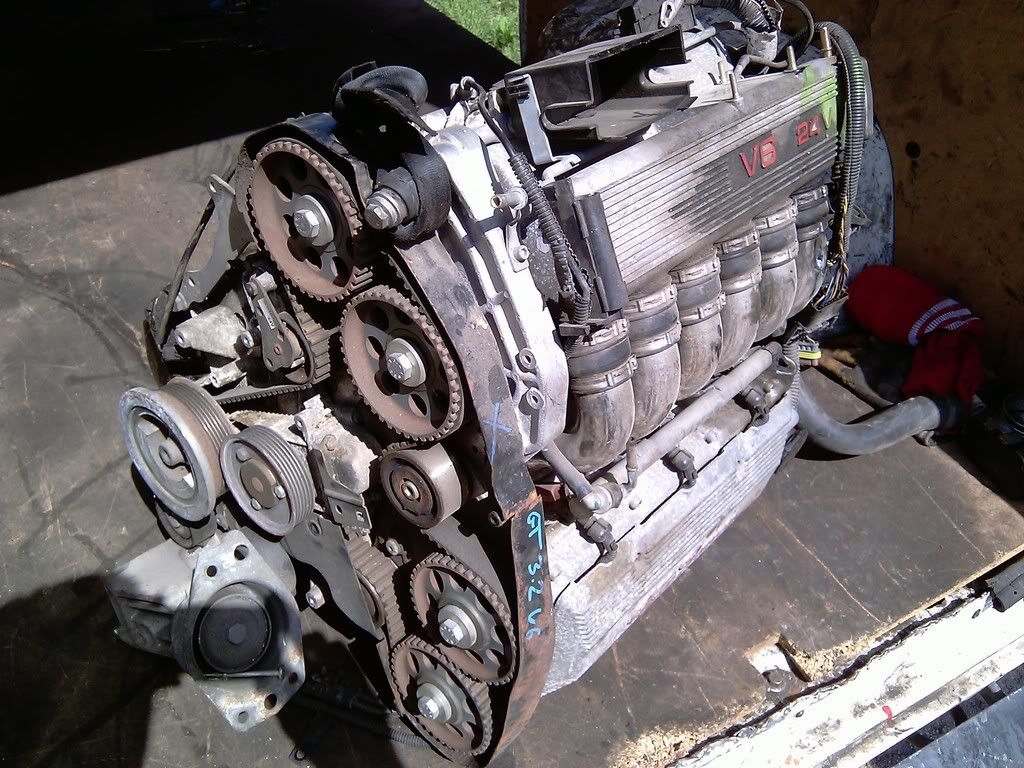
ePer lists crank available as new unit and also as a refurbed unit. I had confirmed by Alfa UK and Alfa Slovakia that the “refurbed” units are new ones anyway, they just sell them to dealers for better price for engines where they failed shortly after warranty. So I ordered a refurbed unit in UK as the price was better there. After few days I got info they don’t sell them anymore. So I tried Alfa in Slovakia and got the same feedback, part is not possible to order for refurbed price due to low stock. They were willing to sell it to me only as a new unit. And the price was more than the whole engine or even a whole car from a breaker. After 2 months of hunting for a crank by Alfa breakers around Europe it became clear that the easiest way will be getting another engine as parts donor. Luckily I found one breakers yard in Hungary that imports cars from UK and Italy for parts. They had a nice engine from side-crashed 3,2 GT with 40k on the clock. The engine looked horrible from the outside, dirty and with damaged wiring and all fragile parts broken as somebody rolled the engine over on the floor few times in the warehouse during long time storage.
![Image]()
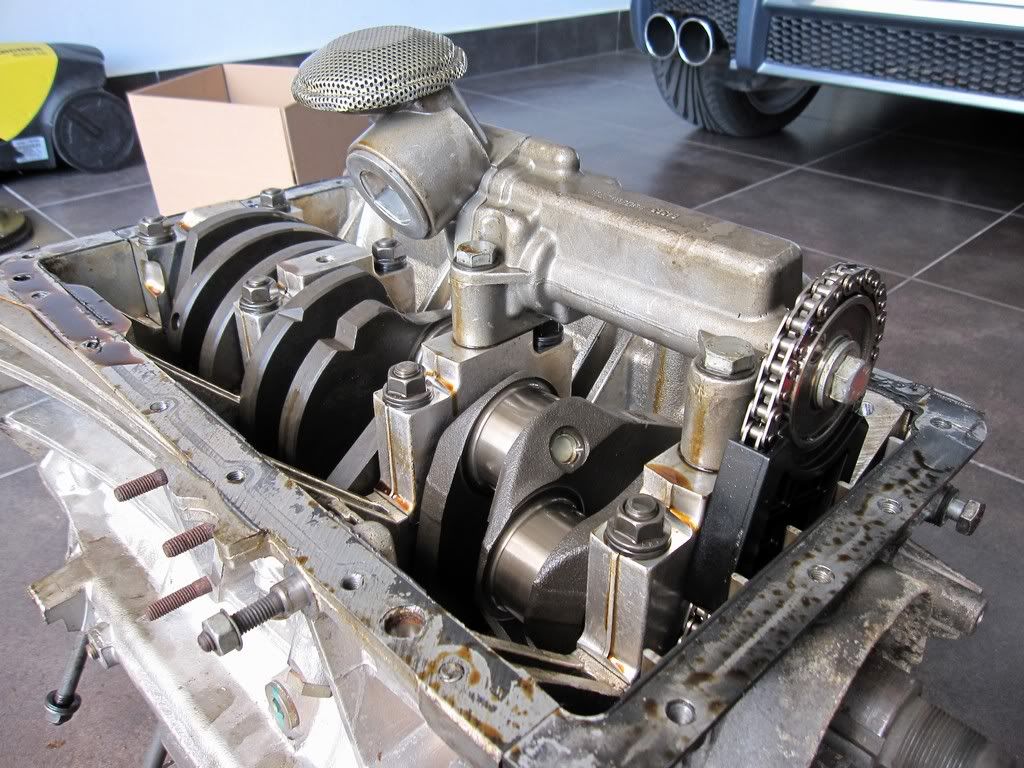
But we removed the sump and it was just perfectly clean inside, no debris in the sump and clean golden oil everywhere, basically looked brand new inside.
So including the engine in my GTA I now have 3 pcs Busso V6 at home.
Here I would like to thank my friend yetyGT who helped me a lot to find and get this engine. Thanks mate. And now we have plenty of spare parts for our cars.
Here are some pictures from the disassembly of the spare engine, no need to comment, I just undid every bolt I have seen, took the parts apart and then put bolts back exactly as they were not to lose or confuse them:
![Image]()
![Image]()
![Image]()
![Image]()
![Image]()
![Image]()
![Image]()
![Image]()
![Image]()
![Image]()
![Image]()
In the following text I will be deliberately calling the engine 3,8l as its easier to use but as I am using 101mm liners it will really be 3749,5 cc engine and I plan to have 3,75 GTA written on the plenum as in my eyes it fits better to Alfa pedigree (1750 engines…)
History:
A friend of mine owned a 3,8l 156 GTA built by Autodelta as their first or one of the first 156/147/GT 3,75 conversions. You may know it, it was the red one with full wide bodykit on the AD press pictures from Brooklands. 40k kms after conversion this engine suffered a failure of big end bearing on cyl.4. Basically the bearings grinded completely to a very thin foil, or maybe the half bearings started to spin, the conrod developed a huge play, engine started to knock and it suffered a crank journal failure. The engine was taken apart after, but never rebuilt again. It spent years split in parts in many boxes somewhere in a garage...
As during last summer my GTA was almost in a condition I couldn´t think about anything to do on it I was missing some “project” in my life so I decided to give a try to the 3,8 rebuilt. Other reason to go for this engine was also that I don’t need to touch my GTA and take any parts of it and I can be building a second engine under no time pressure. Once the 3,8 is finished I just swap it for my current 3,2. In case I don’t build it right and something goes wrong I can always swap the 3,2 back in.
As mentioned, I started the project in summer 2011 with a time plan for the rebuilt of “about a year”.
These are the main specs and components of the engine:
- 3,2 Busso engine block modified by PS Schulze (Germany) to accept 101mm liners
- cylinder liners and seals made by PS Shulze
- custom casted pistons and piston rings made by Pistal Racing (Italy)
- multi layer steel headgaskets made by PS Schulze
- heads ported, and gasflowed including regrind and enlargement of the valve seats (done somewhere in London by some workshop/supplier of Autodelta but I can’t get any detailed info about it)
- stiffer valve springs
- Balzuzzi (Italy) intake camshafts with 10,9mm lift (compared to 9,3mm OEM) and OEM exhaust camshafts
- carbon intake plenum ( @selcuk – looking forward to it )
- F430 TB 84mm
- complete custom made intake, oil catch tank….
- GTV manifolds, EQ pipes, Supersprint..... + stuff that is already on my car now
- remap
Here is the stuff I brought home:


I especially liked the “box with all bolts” that came out of the engine…. I cursed the people who were disassembling it years ago….
The first step was to clean some small things and make a little of order in the parts to be sure what I have and what I miss and make a plan in my head.
The main problem with this engine was the crankshaft and its journal on the con-rod nr4. It was oval , scratched and grinded well under spec… I know a place that could repair it, put new layers of hard chrome on the journals, nitride the journal surface and grind the journals to spec, but the price was quite steep and I was not sure about the result. So I needed a “new” crank.
ePer lists crank available as new unit and also as a refurbed unit. I had confirmed by Alfa UK and Alfa Slovakia that the “refurbed” units are new ones anyway, they just sell them to dealers for better price for engines where they failed shortly after warranty. So I ordered a refurbed unit in UK as the price was better there. After few days I got info they don’t sell them anymore. So I tried Alfa in Slovakia and got the same feedback, part is not possible to order for refurbed price due to low stock. They were willing to sell it to me only as a new unit. And the price was more than the whole engine or even a whole car from a breaker. After 2 months of hunting for a crank by Alfa breakers around Europe it became clear that the easiest way will be getting another engine as parts donor. Luckily I found one breakers yard in Hungary that imports cars from UK and Italy for parts. They had a nice engine from side-crashed 3,2 GT with 40k on the clock. The engine looked horrible from the outside, dirty and with damaged wiring and all fragile parts broken as somebody rolled the engine over on the floor few times in the warehouse during long time storage.
But we removed the sump and it was just perfectly clean inside, no debris in the sump and clean golden oil everywhere, basically looked brand new inside.
So including the engine in my GTA I now have 3 pcs Busso V6 at home.
Here I would like to thank my friend yetyGT who helped me a lot to find and get this engine. Thanks mate. And now we have plenty of spare parts for our cars.
Here are some pictures from the disassembly of the spare engine, no need to comment, I just undid every bolt I have seen, took the parts apart and then put bolts back exactly as they were not to lose or confuse them:


 :thumbs: